.avif)
How to Create an Event on Facebook: A Step-By-Step Guide
Whether you’ve never been on Facebook, or aren’t up to date with the latest trends - learn how to create an event on Facebook with our easy guide!

.svg)
Table of Contents

Need a beginner-friendly guide on how to create and edit your event on Facebook? Learn the basics.
Gen Z is already becoming part of the global workforce. And while many of them are happy to take on roles in digital marketing, there’s one social media platform that they might not be so comfortable with: Facebook.
Despite its reputation for being an “outdated” social media channel, Facebook is still highly relevant in the business and marketing world. In 2023, Facebook was still the biggest social media network with over 3 billion active users. It’s also the third most visited site in the world, and 25% of marketers claim it has the highest ROI of all social media channels.
Facebook ads also reach well over half (62%) of Americans aged 13 and up. So, in many ways it’s the perfect advertising platform for your business (it has a wide reach of people that have spending power).
If you’re wondering “How do I create a Facebook event” but don’t want to let your friends or coworkers know about your gaps in social media knowledge, we’re here to help.
Follow these simple guidelines and you’ll have your next event up on Facebook in no time!
{{SOCIAL_BANNER="/dev/components"}}
Creating an event
This is how to create a Facebook event page from your personal profile.
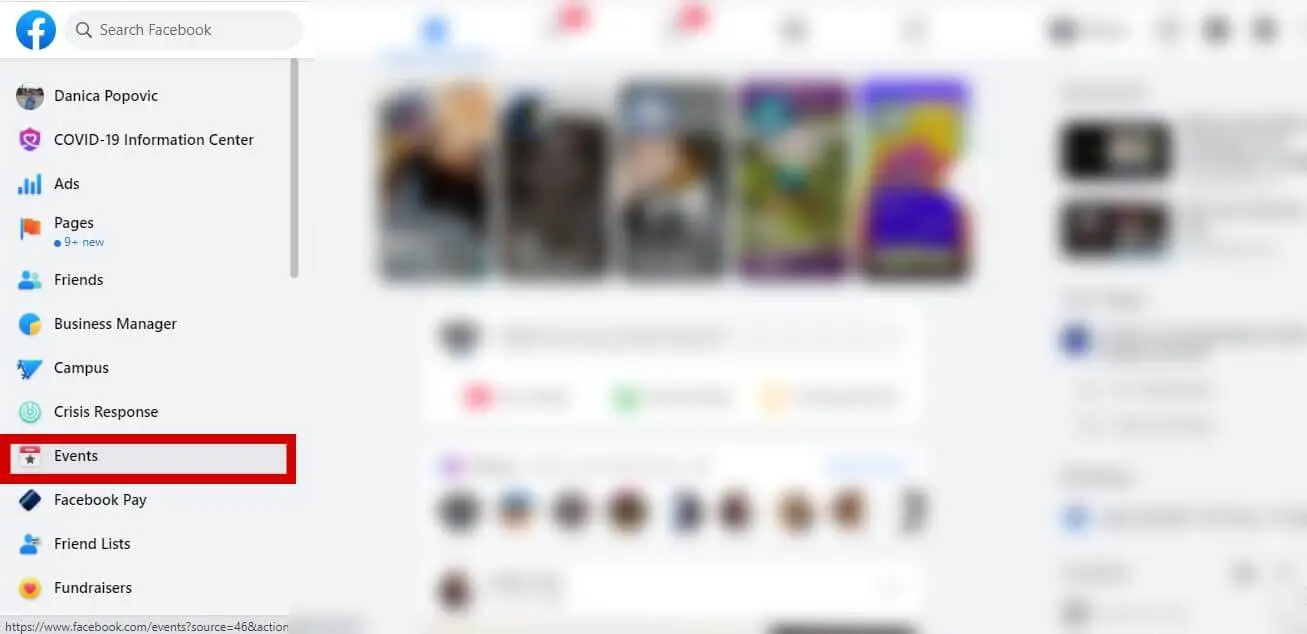
- Go to the newsfeed or home page.
- Select the Events tab from the sidebar (it’s the menu on the left side).
- Click the "create event" button (it’s below the sidebar with calendar, birthday and above the menu with upcoming events)
If you want to know how how to create an event on Facebook business page, this is what you do:
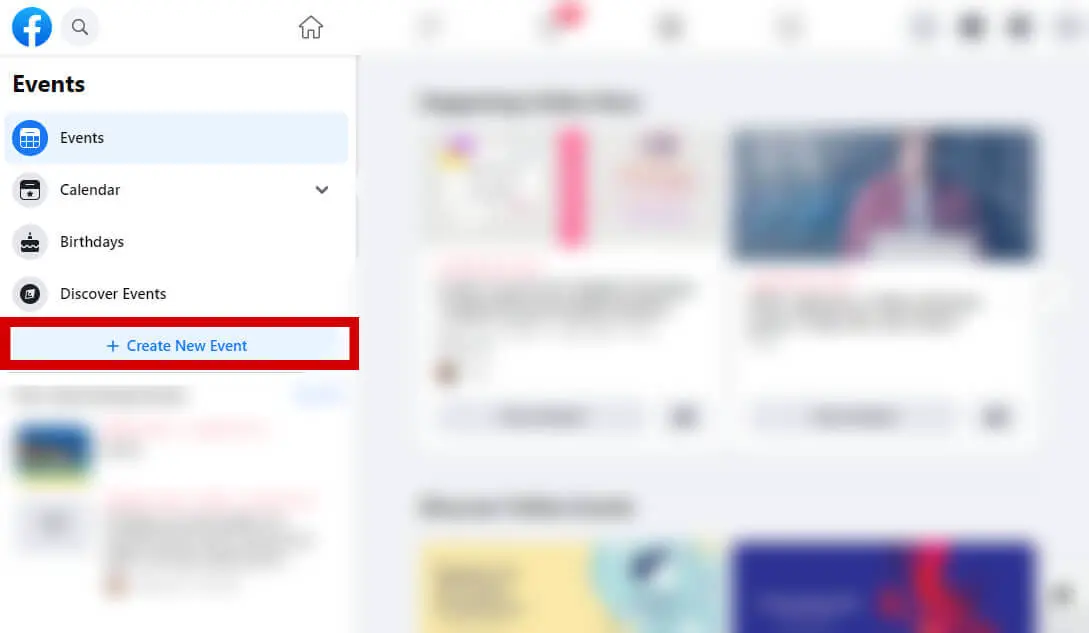
- Go to your Facebook page or follow the same procedure and select the page from the host drop-down menu.
- Tap on the “more” tab found in the top menu and click “Events”
- Click on “Create New Event”
You can only create a recurring event on a Facebook business page. You’ll be able to select “recurring event” in the first step (when you add the event name). You can set the frequency to daily, weekly or custom.
Add the details
Next up, you will be led through a series of steps that will help you customize your event. Remember that these fields are mandatory:
- Whether it’s an online event or in person.
- Event name.
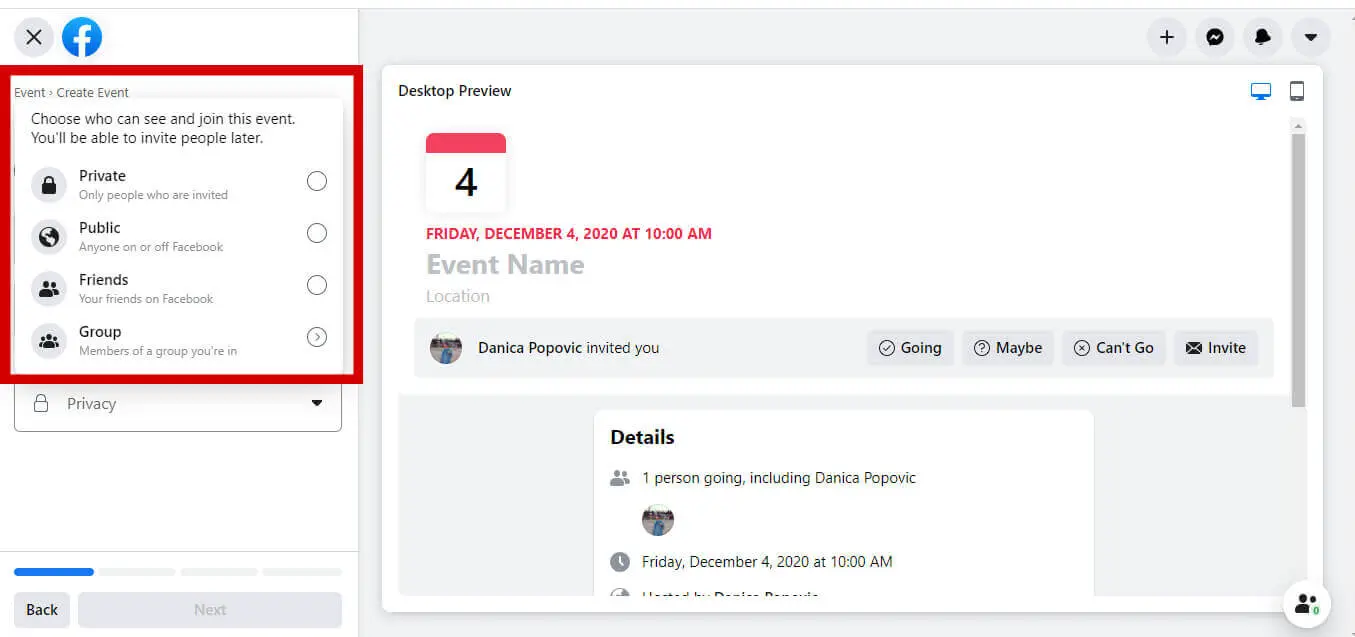
- Privacy setting
You can set privacy by selecting one of the following options from the drop-down menu: public or private event, or an event for your Facebook friends or people in Facebook groups that you are in.
A private event can only be seen and attended by invitees. A public event is open to anyone on Facebook, while events for your Facebook friends or people in groups are limited to these groups of people. Note that creating an event for a Facebook group will get everyone from the group on the guest list (even if they are not your Facebook friends).
You can always invite guests from your Facebook groups or by selecting a guest list from past events you’ve hosted. If you invite everyone from a group page, you don’t need to have them in your friends on your personal Facebook profile.
Customizing your Facebook event page
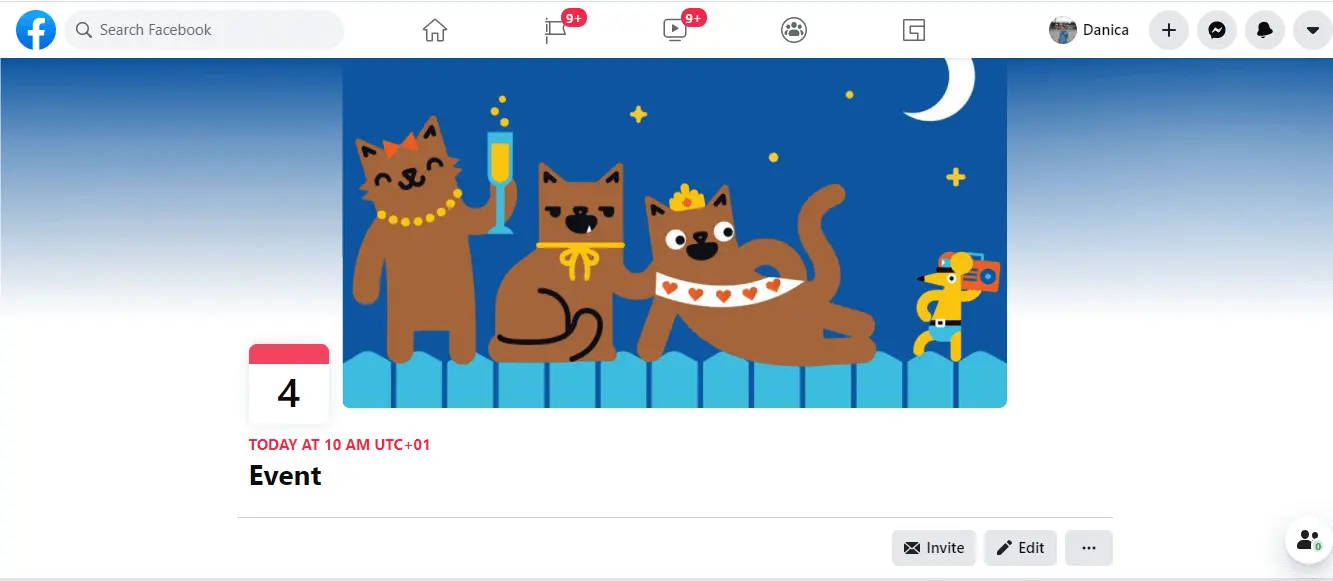
Once created, you’ll be taken to the event page where you can customize and edit event settings.
You can upload an event photo or video for your Facebook event banner, but you can even use the free illustration templates that Facebook now offers.
You can add a new cover photo, change the event description, time, location or any other details by clicking the “Edit” button. If you want to make an announcement, you can also post updates that invitees can see on the event wall.
Creating an online Facebook event
If you’re here wondering how to create an event on Facebook business page, this might be a particularly useful section for you.
Since the covid pandemic, online events have gained popularity, as they’re often more convenient and affordable. Lots of businesses use them to host webinars, Q&A sessions, and even parties.
When you select the online event you can choose what type of event you’re hosting. These are the options:
- Facebook Live: Suitable for over 50 guests, they can watch your event’s live broadcast.
- Messenger Rooms: Create a more interactive experience in a video chat for up to 50 invitees, including hosts and co-hosts.
- External Link: Use if your event is off of Facebook and include anything guests may need to know in the event description.
- Other: Include event details on how people can take part
All the other settings are the same as creating an in-person event.
How to create a Facebook event from your smartphone
Whether you’re here to learn how to create an event on Facebook business page,or your own personal page, this is a handy trick for those on the go.
This is how to create a Facebook event from your mobile app:
- Select the menu icon found in the bottom right corner (found next to the notifications button)
- Go to Events
- Select the “Create” button found on the top
- Follow the same steps as in the desktop app
How to create an event ad on Facebook?
There’s a pretty good chance you’re learning how to create an event on Facebook business page in order to help your business grow. That’s why in addition to creating on, you probably want to learn how to create an event ad on Facebook.
This is not dissimilar to most types of Facebook ad campaigns, however it comes with a couple of specifics. Here’s what you need to know.
Access Facebook Ads Manager
Access Ads Manager or Business Manager on Facebook. This platform is where you kick off the ad creation process, guiding you through setting up your event promotion.
You’ll be automatically signed in with your personal profile. If you want to switch to a business account, you can do that by tapping your profile picture in the top left corner.
If you have a Facebook business account (i.e. you’re the admin of a Facebook page), you’ll also be able to create an account with Facebook Business Manager
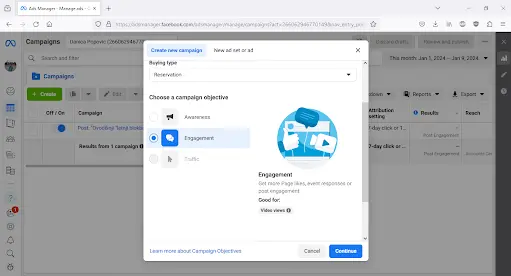
Choose your marketing objective
The best objective for promoting Facebook events is Engagement, and you should choose Reservation as the buying type (formerly “Reach”).
Define your audience
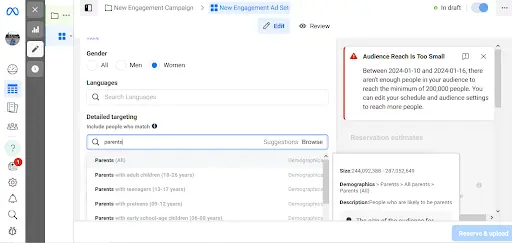
No amount of clever copy and stunning ad design can make up for a bad audience targeting. This is especially true of Facebook event ads, since you probably want a fairly specific type of people to attend your event.
Add detailed demographics, location and use the “Detailed targeting” to define your audience further (e.g. parents, university students, graduates, etc.)
Set your budget and schedule
Decide your ad campaign's budget and duration to manage expenses and optimize reach. This budget controls how much you're willing to spend on promoting your event.
As with all other ad campaigns, don’t expect to launch the ads and forget about it. There’s a pretty good chance you might want to increase or decrease your budget depending on how the ad performs. For example, if you have limited capacity for your Facebook event, you also don’t want too many people to see it and create a logistical nightmare for you.
Select ad format
Choose an engaging ad format—single image, carousel, video—that best showcases your event. The right format can significantly impact audience engagement.
You can also choose to promote an existing Facebook post in case you want to advertise on this platform only. If you want to use other platforms and formats (Instagram, banners on other sites), you’ll need to create a custom ad.
Design your ad
If you go the custom route, you’ll need to design captivating visuals and write concise yet compelling ad copy highlighting key event details. This content should entice viewers to learn more about your event.
If you wish to use the single image format, it’s a good idea to adapt your Facebook event banner to fit the ad requirements. This will allow people who click on your ad to have a seamless experience and immediately know they’re in the right place.
Of course, this is hardly something you can do with Facebook event banner templates, unless you have the help of a professional designer.
Either way, make sure you follow the recommended image size guidelines for a Facebook ad (1080 x 1080 pixels, 1:1 ratio).
Add event details
Since we’ve already learned how to create a Facebook event page, this part is easy.
Integrate your event by selecting "Add Event," linking it to your ad by choosing from your Facebook page or creating a new one. This step directly connects your ad to the event page.
Review and publish
Thoroughly review all ad elements, including targeting, budget, visuals, and copy, before publishing the ad campaign. A final check ensures everything aligns with your event promotion strategy.
You can always edit your ad as you go (expect the objective). However, remember that you’ll need to wait for the ad to be approved after each alteration. And these kinds of delays can seriously affect event promotion campaigns, so it’s best to double check everything.
Monitor and optimize
Keep a close watch on ad performance in Ads Manager and make adjustments to targeting or content for improved results. Regular monitoring helps optimize the ad's effectiveness during the campaign duration.
If you want to extend your campaign you can do that easily. Or if you want to end it early, simply switch the “Active” button on your campaign from the main Ads Manager dashboard.
Need further Facebook tips?
We hope you found this short guide helpful and found all the information to create your event on Facebook. If you need further tips on navigating this social media platform, be sure to check out our articles on the best Facebook ads, as well as this brief guide on Facebook event banner size and this step-by-step on how to add Facebook events to your Google calendar.
Having lived and studied in London and Berlin, I'm back in native Serbia, working remotely and writing short stories and plays in my free time. With previous experience in the nonprofit sector, I'm currently writing about the universal language of good graphic design. I make mix CDs and my playlists are almost exclusively 1960s.
A design solution you will love
Fast & Reliable
Fixed Monthly Rate
Flexible & Scalable
Pro Designers


.avif)


